
To pay a crypto invoice with USDT or USDC safely, verify who sent the link, read the payment purpose and amount, select a token and blockchain network your sending wallet supports, then copy every payment detail from the current checkout. After sending, keep the transaction hash and wait for the invoice itself to show a confirmed result.
The important distinction is that the token and network form one route. “USDC on Base” and “USDC on Ethereum” are not interchangeable instructions. Likewise, USDT and USDC are different assets even if both are designed to track the US dollar.
| Before you send | What to confirm |
|---|---|
| Link | Expected merchant and trustworthy domain |
| Invoice | Purpose, reference and amount match your purchase |
| Route | Exact token and exact network are supported by your wallet |
| Funds | Enough stablecoin plus any network fee required by the wallet |
| Destination | Address copied from the current checkout |
| Deadline | Enough time remains to complete the transfer |
1. Confirm the invoice is the one you expect
Do not begin with the QR code. Begin with the business context. The merchant name, invoice description, order reference and fiat amount should match the sale you agreed to. If you expected a USD 125 landing-page invoice but the page says USD 1,250 or describes a different service, stop and contact the seller through a channel you already trust.
Check the domain in the address bar rather than relying on a logo or screenshot. A legitimate invoice can still be forwarded incorrectly, and a fake page can copy branding. If the link arrived after an unexpected account change or urgent request, verify it independently with the merchant.
The checkout’s public description is for you. An internal or private note belongs to the seller’s reconciliation workflow and should not expose sensitive personal data. You normally do not need to type an order reference into the blockchain transaction because the invoice already carries the commercial context.
2. Choose USDT or USDC deliberately
Use a token already available in a wallet you control. Do not choose solely by ticker or an assumed low fee. Confirm the complete asset name and contract shown by your wallet, especially when a wallet has imported tokens with similar symbols.
USDT and USDC are separate stablecoins. Sending USDT to a checkout route that expects USDC does not satisfy the invoice, even when the numeric amount is identical. If the invoice offers only one token, use that token or ask the seller for another supported option before sending.
For business accounting, the invoice may be denominated in USD while settlement occurs in a stablecoin. The checkout should show the calculated token amount. Pay that displayed amount rather than independently converting the invoice total.
3. Match the blockchain network
The network is part of the destination. Select the same network in your sending wallet or exchange withdrawal form that the checkout displays. The names may appear as Base, Ethereum, TRON, Polygon or another enabled route, but the live checkout—not a remembered message—is the source of truth.
Before choosing a route, verify that:
- your wallet or exchange supports withdrawals for the exact token on that network;
- withdrawals are currently available;
- you have enough native network asset if a self-custody wallet requires gas;
- the merchant checkout still offers the route;
- enough time remains for the transfer and confirmation.
If an exchange displays a warning or temporarily disables the network, do not substitute another network. Return to the checkout and choose another route only if that route is offered there.
4. Copy the current amount and recipient
Use the copy controls or scan the QR code from the live checkout. Then compare the beginning and end of the recipient address in your wallet before confirming. Malware and clipboard replacements are real risks, so this short visual check matters.
Send the exact token amount shown. Do not subtract the network or withdrawal fee from the invoice amount. Some exchanges charge the fee separately; others deduct it from the withdrawal. Review the withdrawal preview to make sure the recipient is expected to receive the full amount.
Avoid splitting one invoice across several transfers unless the merchant explicitly supports partial payments. Multiple transfers complicate matching, and the checkout may be designed to recognize a single expected transfer.
Worked example: paying ORDER-4821
Suppose a customer agreed to pay USD 125 for a landing-page delivery. The merchant creates invoice ORDER-4821 and sends its hosted checkout. The buyer verifies the business and description, chooses USDC on Base, and the page displays 125 USDC with the recipient address.
The buyer opens a compatible wallet, chooses Base, pastes the recipient, enters 125 USDC and keeps enough ETH on Base for the gas fee. The wallet preview shows that the recipient receives 125 USDC. After sending, the buyer copies the transaction hash and returns to the checkout. The merchant dashboard later connects that same confirmed transfer to ORDER-4821.
Actual GramPayBot UI captured from the current product with synthetic data. The merchant website is an illustrative integration.
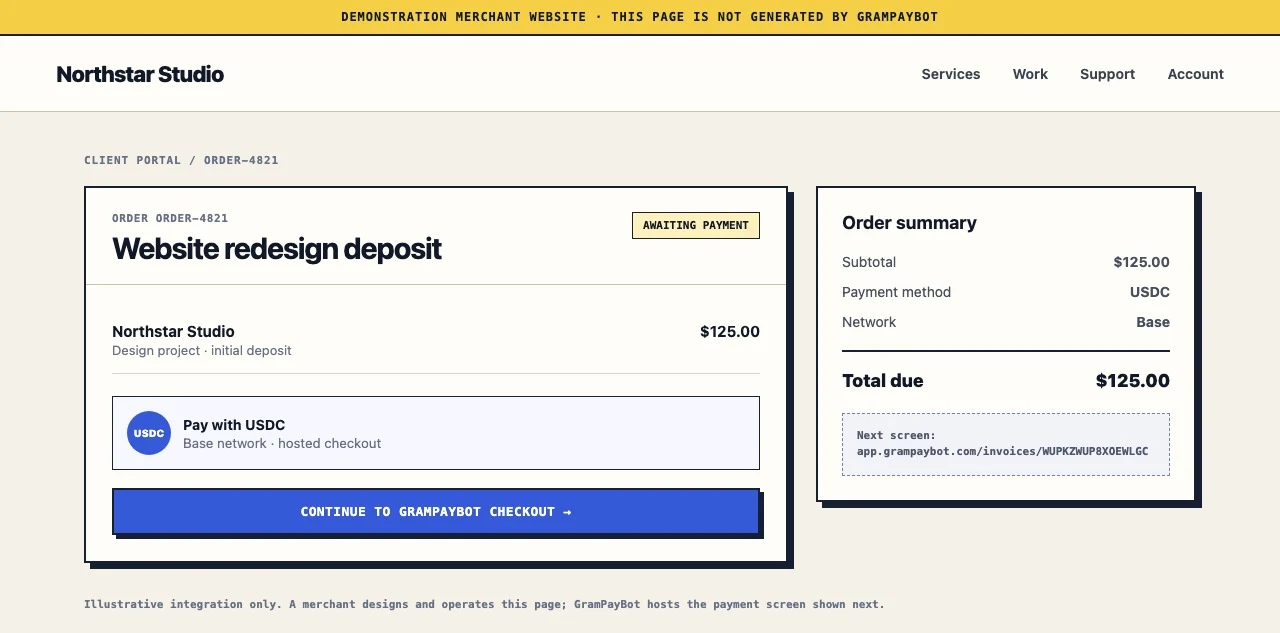
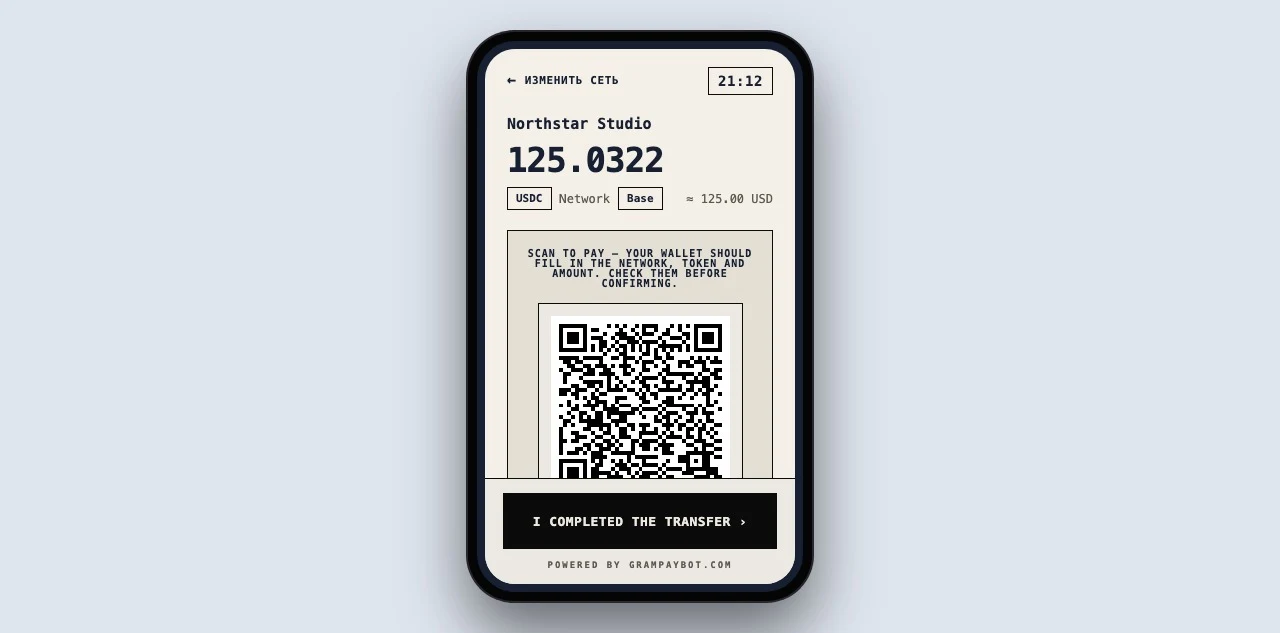
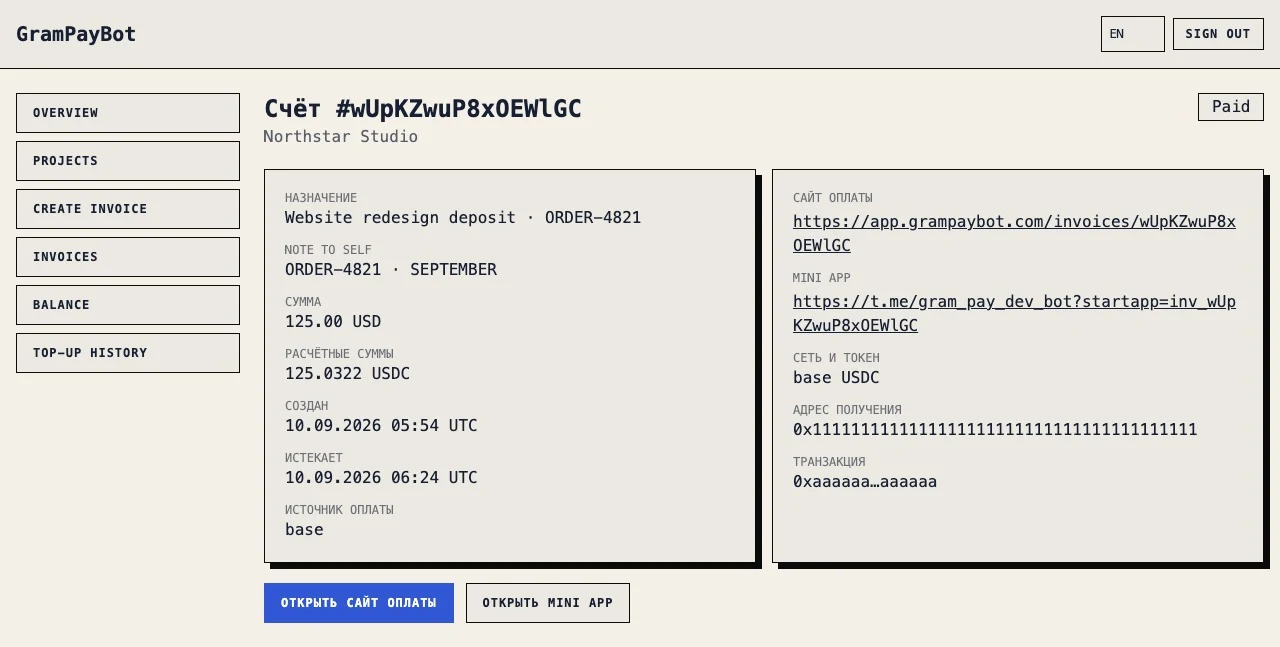
The merchant website is illustrative. The checkout and cabinet are actual current GramPayBot screens captured with synthetic data, not a real customer account or payment.
5. Review the wallet confirmation screen
The last wallet screen is the final moment to prevent an irreversible error. Read it instead of treating it as a generic confirmation dialog. Check:
- the asset is USDT or USDC as requested;
- the network matches the checkout;
- the recipient matches at least the visible beginning and end;
- the recipient amount equals the invoice requirement;
- the network fee is acceptable and not being deducted from the principal;
- you are signing a transfer, not granting an unrelated smart-contract permission.
If any field differs, cancel and rebuild the transfer from the checkout. Do not rely on the seller to recover funds sent through an unsupported network or to an address they do not control.
6. Save the transaction hash
After broadcast, copy the transaction hash from the wallet or exchange. A hash identifies the on-chain transaction and lets both parties inspect its token, network, sender, recipient, amount and confirmation state.
A hash is useful evidence, but it is not automatically proof that the invoice is correct. A real transaction can still use the wrong token, recipient, amount or time. It must be compared with the invoice. Never send a seed phrase, private key, login code or remote-access permission as “additional proof”; no legitimate payment verification needs those secrets.
7. Wait for the invoice status
“Submitted” in a wallet means the transfer was broadcast. It may still be pending. A merchant may wait for a particular confirmation state before marking the invoice paid. Keep the checkout open or revisit the same link and allow it time to update.
Do not send a second payment just because the page has not changed immediately. First inspect the transaction using the hash and confirm whether it is pending, failed or confirmed. Then share the hash with the seller if manual review is needed.
| What you see | Recommended action |
|---|---|
| Pending transaction | Wait; do not resend |
| Failed/dropped transaction | Confirm failure, then reopen current checkout |
| Confirmed transfer, invoice pending | Share hash and invoice reference with merchant |
| Invoice expired before sending | Request or open a current invoice |
| Invoice expired after a confirmed send | Preserve hash and ask for manual review |
Common mistakes and how to recover
Wrong network selected before sending. Cancel the wallet operation and return to the checkout. Nothing is lost if it was not signed or broadcast.
Wrong network after sending. Do not send again immediately. Record the hash and contact the merchant. Recovery depends on whether the recipient controls that address on the network used and may be impossible. Follow the wrong-network recovery guide.
Wrong token. Preserve the hash and report the exact contract and network. A similar ticker is not sufficient evidence that the expected asset arrived.
Underpayment. Tell the merchant what the receiving address actually got. Do not top up using an old or expired route without instructions, because the second transfer may not be combined automatically. See the underpayment and overpayment policy.
Overpayment. Keep the hash and contact the merchant. Refunds require a separate on-chain transaction and may involve network fees and verification.
Payment after expiry. A timer protects the invoice logic, not the address from receiving funds. If you already paid, do not create a duplicate. Ask the merchant to review the confirmed transfer against the expired invoice using the late and expired invoice workflow.
Exchange withdrawal delay. The exchange may show “processing” before a blockchain transaction exists. Wait for a hash. The merchant cannot verify a transfer that has not been broadcast.
Buyer security checklist
- Open the link only from the seller conversation you expect.
- Confirm the domain and invoice purpose.
- Use the route displayed in the current checkout.
- Check token contract details in your wallet when uncertain.
- Keep enough network asset for gas where required.
- Compare the recipient after pasting or scanning.
- Ensure the recipient receives the exact amount.
- Save the hash and invoice reference.
- Wait for confirmation before retrying.
- Never disclose a recovery phrase or private key.
What the seller should provide
A buyer can only follow a safe process when the invoice is clear. The seller should send one canonical link, state what the payment is for, avoid pasting a second address in the message, and remain available for exceptions. The checkout should expose live routes and a visible status. For the seller-side workflow, see how to create a crypto payment link.
Final rule
Treat a stablecoin invoice like a precise route, not a loose request for “crypto.” Match business, invoice, token, network, recipient and amount before signing. Save the hash after sending and use the invoice status—not a screenshot or an empty wallet balance change—to decide whether the payment is complete.
Before sending, open the supported-routes directory for the exact token and network. If the asset name or contract is uncertain, use the USDT and USDC token verification checklist.
Next step
Create a tracked crypto payment link
Issue a USDT or USDC invoice manually, send one hosted checkout and follow its payment status without an API.
Explore payment links →